

Tuesday, May 31, 2016
Zodiac Cross-Stitch
Just added some Zodiac buttons to my Etsy store, all buttons hand cross-stitched by me! 😄 I'm a cancer, what's your sign? 🦀♋️
Thursday, May 19, 2016

Tuesday, May 17, 2016
Is It Summer Yet?
It's such a lovely warm day here in SF, I'm sooo ready for summer-anyone else ready? The critters certainly are! ☀️🍹

Friday, May 13, 2016
Book Party
Happy Friday!

This weekend, Sunday May 15th at 11am, Kara Hamilton will be at Books Inc to promote the children's book we worked on together, A New Leash on Life.
Check it out if you're around, there will be live dogs there!
51 Tamal Vista
Corte Madera, CA 94925
www.karahamilton.com
Wednesday, May 11, 2016
Mini Totoro Crochet Pattern
Mini Totoro!

This pattern is for a teeny tiny totoro! It is a little tricky and best for more experienced crocheties, but you can follow the pattern all the same with any size hook or yarn you are most comfortable with because a bigger size can make this pattern easier to follow.
This pattern is also available under the 'Crochet Patterns' tab.
Also! I have a video, so you can follow along on YouTube too:
https://www.youtube.com/watch?v=2rnBxHg51sI
I love seeing people's work, so share with me!
Materials:
Crochet Hook 1.50mm
Embroidery Thread DMC 844 & 310
White Thread
Sewing Needle
Tapestry Needle
Small Amount of Polyester Fiber Fill (Doll Stuffing)
Small Piece of White Felt
Chopstick (or something with a pointy end for stuffing)
Scissors
0.05 Pen (to mark sewing points for face & chest details, optional)
Small Gold Safety Pin (for stitch marker, optional)
** I work in a continuous round and that includes any little body limbs- In this case, Totoro's ears and tail.
Abbreviations:
RND round
sc single crochet
ch chain
inc increase
st stitch
dec decrease (sc dec single crochet decrease)
Pattern:
RND 1 3 sc in magic ring (3)


RND 2 2 sc inc in next st, ch 3, sc in each ch starting in 2nd ch from hook, 2 sc inc in next st,
ch 3, sc in each ch starting in 2nd ch from hook, 2 sc inc in last st (6)


RND 3 2 sc inc in next sc, sc in next sc, reapeat around in remaining stitches (9)
RND 4 sc in each st around (9)
RND 5 2 sc inc in next st, sc in next 2 st, repeat around in remaining stitches (12)
RND 6 sc in each st around (12)
RND 7 2 sc inc in next st, sc in next 3 st, repeat around in remaining stitches (15)
RND 8 sc in each st around (15)
RND 9 sc in next 2 sc, ch 2, sc in 2nd ch (last ch) from hook, sc in next st and each remaining st around (15)
RND 10 sc dec, sc in next 3 st, repeat around in remaining stitches (12)


 RND 12 sc dec around until closed
Use your thumb to poke his booty up so it becomes a little flat so he can stand upright.
Take a tapestry needle and fasten off the two tails.


Next, cut out three small pieces of white felt, two small for the eyes and one bigger for the chest (as shown).
Lay them up against Totoro's body to begin cutting out circles to be sewn onto Totoro's body.
I just eyeball it until the pieces are about the size and shape I like, but you could trace out circles on the felt if that is easier. Just cut inside the line that you drew so your markings can no longer be seen.


Once you have your eyes circles cut out, you can use a 0.05 pen to put a dot on the felt to mark where you will sew the knot that will be Totoro's eye.
Just make sure that the side with the mark will be the side facing down on Totoro's body so no one can see the pen mark in case you sew a little off the mark.
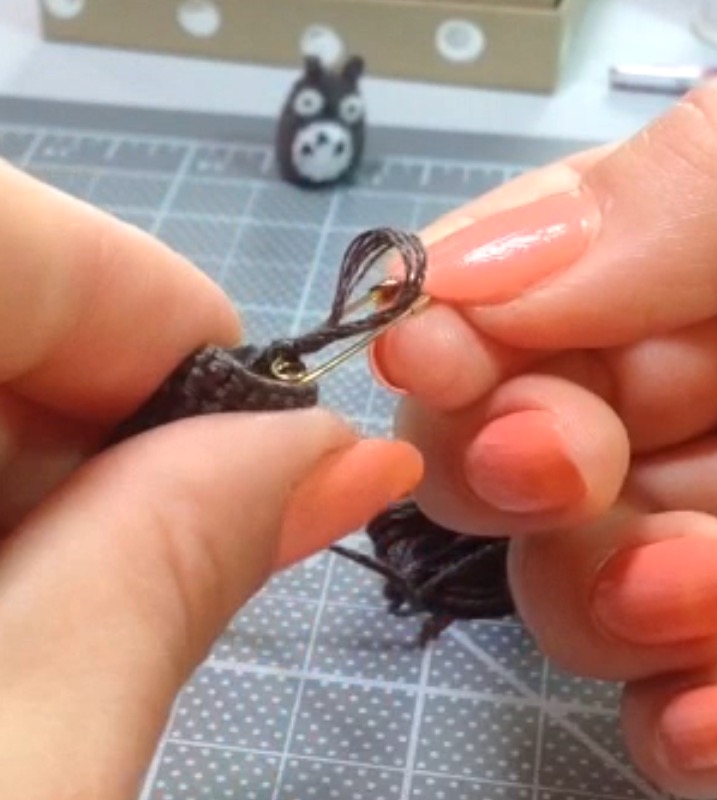
 Take a strand of DMC 310 (black) and split the 6 strands into 3.
Thread 3 of the strands onto your tapestry needle and put the needle through the backside of Totoro through to his front side and the tiny piece of felt (through the dot you made with the pen).
Sew the eyeball on with a knot. You can do an FK knot back through the felt and Totoro's body if you wish.
Once you have made your knot (or FK knot), insert the needle under you knot and through to the other side of Totoro's head to sew on the second eye.


Insert the needle under the second's eye's knot to the middle of Totoro's face to make a nose.
Sew a knot (or FK knot) onto the surface of Totoro's face and insert the needle back into Totoro's body through to his back where you can fasten off the thread.

 Next, take the chest piece you cut out and with your tapestry needle and 3 strands of the black (DMC 310) thread, sew on 3 upside down V shapes.
You can use your 0.05 pen to mark sewing dots again too.

 Once you have sewn on the 3 V's, take a regular sewing needle and white sewing thread to sew the chest piece onto Totoro.
Insert the needle into Totoro's back, in order to hide you knot and pull it through the front of Totoro and the chest piece.

 Sew around the edge of the chest piece to secure it to
Totoro's body. You don't have to sew all the way through Totoro's body
to secure the felt, just sew through the surface stitches on the front
of the body.
Sew around the edge of the chest piece to secure it to
Totoro's body. You don't have to sew all the way through Totoro's body
to secure the felt, just sew through the surface stitches on the front
of the body.
Fasten off once you have sewn all the way around by inserting the needle through to the back side of Totoro.


This pattern is for a teeny tiny totoro! It is a little tricky and best for more experienced crocheties, but you can follow the pattern all the same with any size hook or yarn you are most comfortable with because a bigger size can make this pattern easier to follow.
This pattern is also available under the 'Crochet Patterns' tab.
Also! I have a video, so you can follow along on YouTube too:
https://www.youtube.com/watch?v=2rnBxHg51sI
I love seeing people's work, so share with me!
Materials:
Crochet Hook 1.50mm
Embroidery Thread DMC 844 & 310
White Thread
Sewing Needle
Tapestry Needle
Small Amount of Polyester Fiber Fill (Doll Stuffing)
Small Piece of White Felt
Chopstick (or something with a pointy end for stuffing)
Scissors
0.05 Pen (to mark sewing points for face & chest details, optional)
Small Gold Safety Pin (for stitch marker, optional)
** I work in a continuous round and that includes any little body limbs- In this case, Totoro's ears and tail.
Abbreviations:
RND round
sc single crochet
ch chain
inc increase
st stitch
dec decrease (sc dec single crochet decrease)
Pattern:
RND 1 3 sc in magic ring (3)


RND 2 2 sc inc in next st, ch 3, sc in each ch starting in 2nd ch from hook, 2 sc inc in next st,
ch 3, sc in each ch starting in 2nd ch from hook, 2 sc inc in last st (6)


RND 3 2 sc inc in next sc, sc in next sc, reapeat around in remaining stitches (9)
 | ||
| **Skip over the ears you made and continue working in the next st |
RND 5 2 sc inc in next st, sc in next 2 st, repeat around in remaining stitches (12)
RND 6 sc in each st around (12)
RND 7 2 sc inc in next st, sc in next 3 st, repeat around in remaining stitches (15)
 | |
| **You can use a stitch marker after RND 7 if you like, sometimes I'm distracted by Netflix when I crochet ;-) |
RND 9 sc in next 2 sc, ch 2, sc in 2nd ch (last ch) from hook, sc in next st and each remaining st around (15)
 |
| **Depending on your tension, you may only need one sc before making the tail. The tail should be made at the middle of Totoro's back, so you can estimate. |
RND 10 sc dec, sc in next 3 st, repeat around in remaining stitches (12)


**Skip over the tail and continue working in the next st
RND 11 sc dec, sc in next 2 st, repeat around in remaining stitches (9)
At
this point, it's time to stuff! Use your pointy end (I like a
chopstick) to begin stuffing small amount of polyester fiber fill into
your Totoro's body.

Use your thumb to poke his booty up so it becomes a little flat so he can stand upright.
Take a tapestry needle and fasten off the two tails.


Next, cut out three small pieces of white felt, two small for the eyes and one bigger for the chest (as shown).
Lay them up against Totoro's body to begin cutting out circles to be sewn onto Totoro's body.
I just eyeball it until the pieces are about the size and shape I like, but you could trace out circles on the felt if that is easier. Just cut inside the line that you drew so your markings can no longer be seen.


Once you have your eyes circles cut out, you can use a 0.05 pen to put a dot on the felt to mark where you will sew the knot that will be Totoro's eye.
Just make sure that the side with the mark will be the side facing down on Totoro's body so no one can see the pen mark in case you sew a little off the mark.

Thread 3 of the strands onto your tapestry needle and put the needle through the backside of Totoro through to his front side and the tiny piece of felt (through the dot you made with the pen).
Sew the eyeball on with a knot. You can do an FK knot back through the felt and Totoro's body if you wish.
Once you have made your knot (or FK knot), insert the needle under you knot and through to the other side of Totoro's head to sew on the second eye.


Insert the needle under the second's eye's knot to the middle of Totoro's face to make a nose.
Sew a knot (or FK knot) onto the surface of Totoro's face and insert the needle back into Totoro's body through to his back where you can fasten off the thread.


You can use your 0.05 pen to mark sewing dots again too.


Insert the needle into Totoro's back, in order to hide you knot and pull it through the front of Totoro and the chest piece.


Fasten off once you have sewn all the way around by inserting the needle through to the back side of Totoro.


TA-DA!

Please share your Totoro with me!
Teeny Tiny Totoros are cute, but stealing is not!
Please be sure to give credit where credit is due when sharing.
No selling of this pattern in any form is permitted.
©Alexandria Gold 2016
Tuesday, May 10, 2016
Little Moments
Just wanted to share this new addition to the character design portion of my website. I love the feeling of this baby girl because it makes me stop and appreciate the little sweet moments throughout the day~

Monday, May 9, 2016
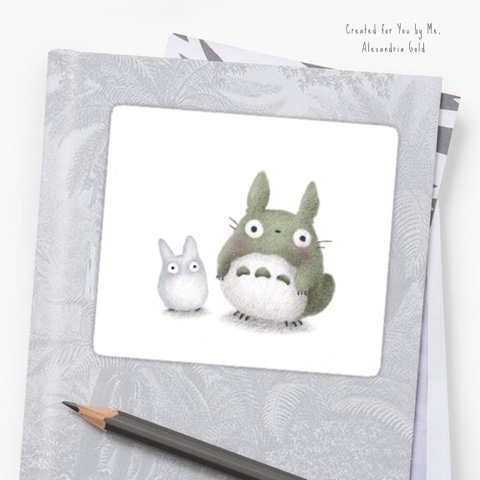
Stickers!
A Ria Art Totoro sticker!!! 😍😍
Checkout more fan art stickers on Redbubble in my shop: RiaArtWorld
Friday, May 6, 2016
New Section
I just updated my website & here one of my favorite additions to my new black & white section!

I call her my little wanderer ;-)
Thursday, May 5, 2016
Drac Cat
So satisfying to see my mounted prints from my Drac Cat story about my cat, childhood stuffed animals and of course Young Drac! Just had to share💓

Spring Show, here I come!
Wednesday, May 4, 2016
Shaky shaky
After all this time I'll finally be getting my masters degree & get to participate in the AAU spring show! This calls for a fiesta!!

These two got it covered!
Subscribe to:
Posts (Atom)